Atualizado em
In Docs we can create header and footer templates that are applied to documents automatically.
Templates are linked by folder or classification.
The models and documents sent must be in the extension .xlsx.
- Go to Dashboard.
- Click on Docs – Documents.
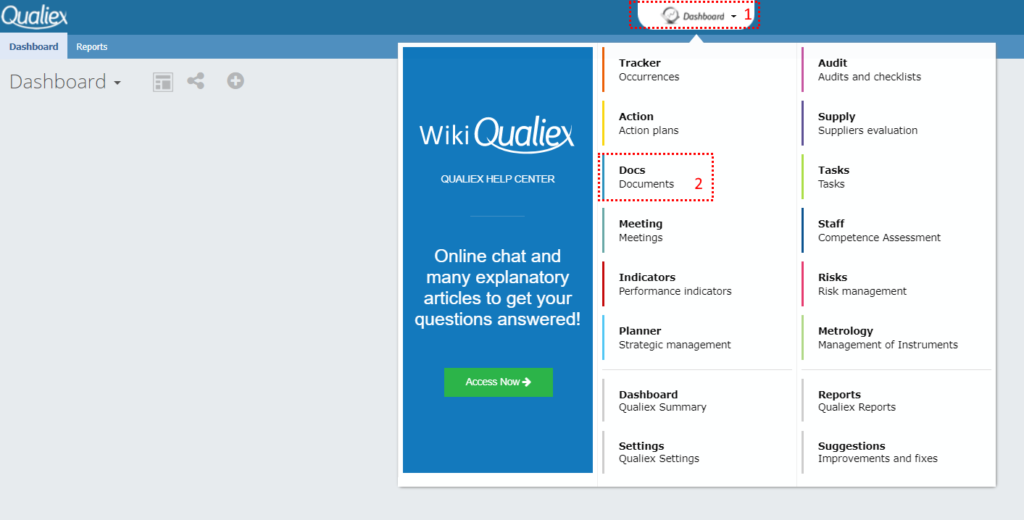
3. Click on the “Header and footer templates ” tab

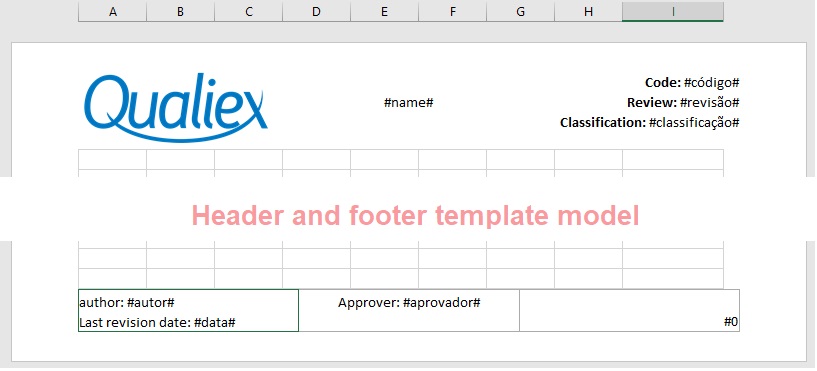
We can put TAGs in the header and footer, so the document data is automatically inserted.
TAGs are document data between the symbol #. For example, # name # will display the name of the document in the header / footer when using this TAG.
To view the available TAGs click on Header and footer templates> TAGs.
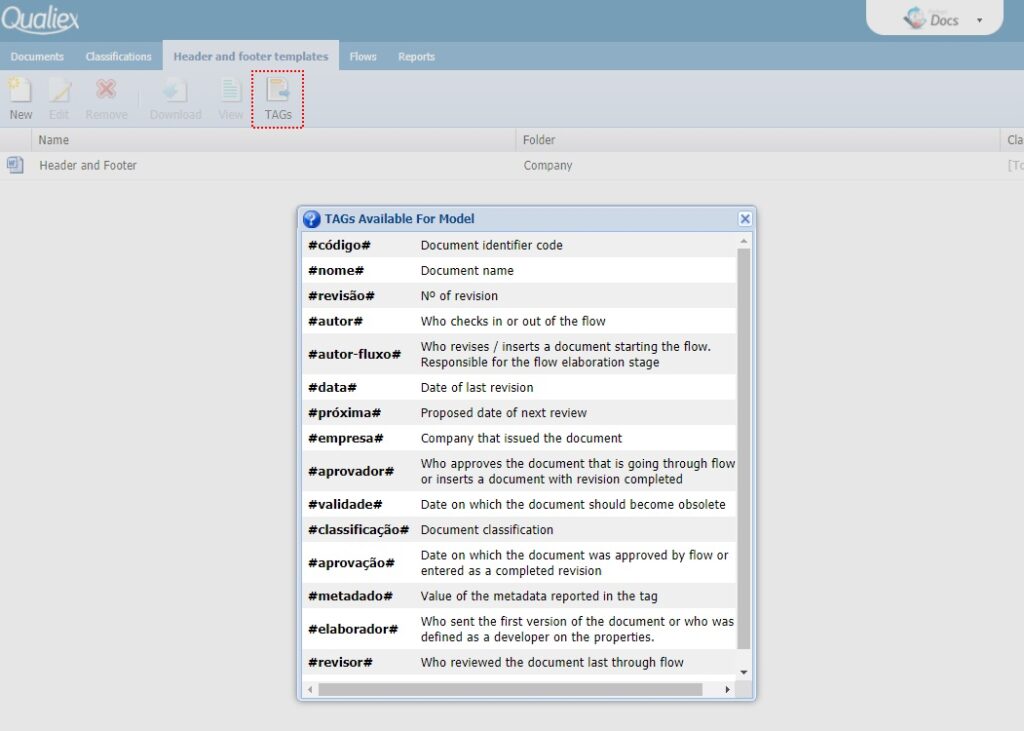
If the classification that will be linked to the header and footer has metadata registered, insert it as it was entered between #.
To create a header and footer template in excel, open a new document.
This document must be empty, with only the header and footer.
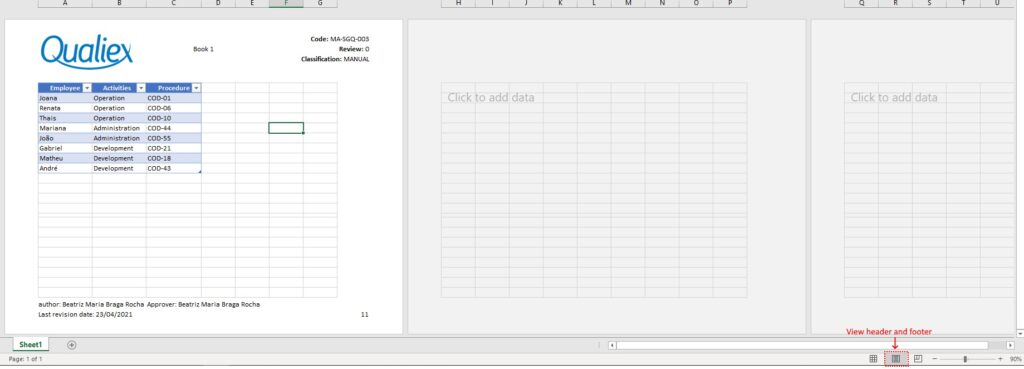
Click to view Page Layout and double-click on the top of the document to enable the header and footer.
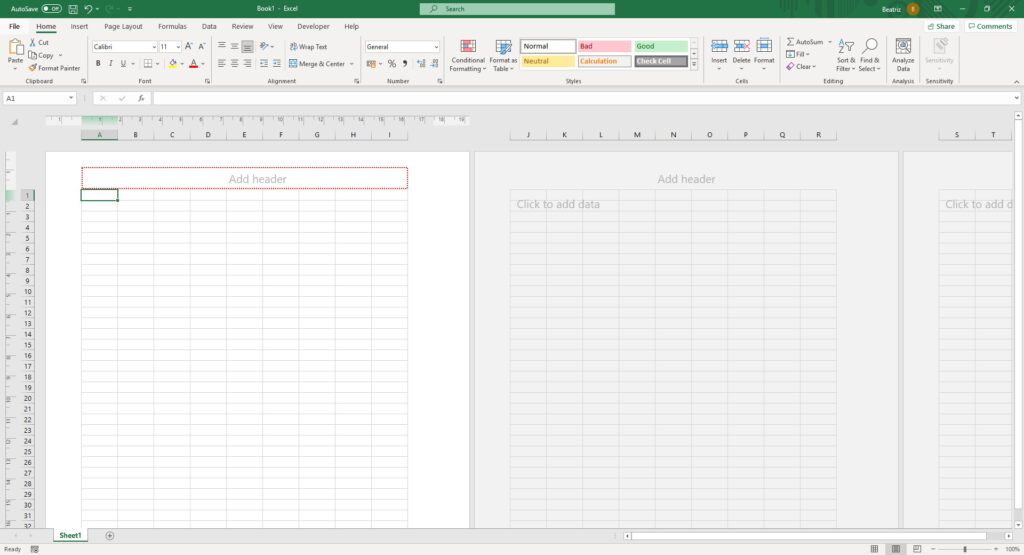
Assemble the header and footer as needed.
In Excel, 250 characters are allowed in a header or footer, be aware of the TAGS that, when replaced by information, must not exceed the limit.
Restrictions:
The template that will be used for documents in excel cannot have the elements:
- The images must be in JPEG format.
- For incorrectly typed TAGs, delete and retype.
- It cannot have shapes, SmartArt or hyperlinks in the document. It is necessary to be an image.
Sending the template to DOCS
Click Header and Footer Templates> New.

The screen for entering the model will appear.
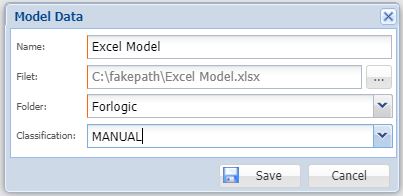
- Name: Enter the name that will be used in the model.
- File: Select the .xlsx file on the computer.
- Folder: Select the folder that will have this header as a template. It will be replicated to subfolders.
- Classification: To which classification the model will be linked. Selecting Not Informed is applied to all classifications.
Click ” Record” to finish.
After inserting a new header and footer template, it will be applied only to new documents.
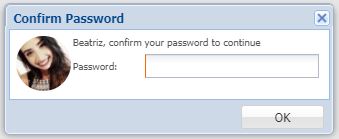
For units that have the option Password confirmation for critical operations enabled in the Qualiex security options, it will be necessary to enter the password to complete the upload of the new model.
After this, sending a new document, the configured header and footer will be applied.
In Excel, the header and footer are not displayed in the preview.
- To view the applied header and footer you must:
- Print the document.
- Get a copy and change the Page Layout.
Restrictions for applying header and footer in .xlsx documents
Due to a limitation in the technology of viewing documents online, when a document has some elements, the header and footer is not applied automatically and may corrupt your document.
By obtaining a copy of the document, the elements are maintained, without altering the view of the copy or the file settings.
If the document that is sent to Docs contains the elements below, the header and footer do not apply, and it is not possible to see the document in the Microsoft viewer.
- SmartArt Shapes
- Hiperlinks in the document
- Macro
- Formula
- Graphics
- Frozen Panel
- Password protected spreadsheet
- Cell with hidden value
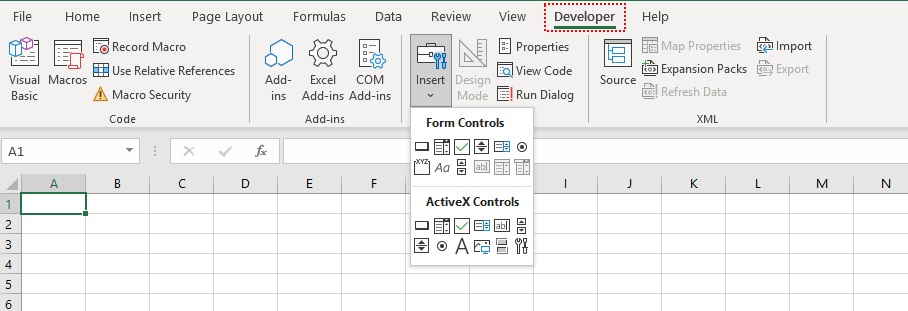
- Visual Basic Excel tools (developer tab)