With a registered occurrence, it’s necessary to approve if the registration fits according to the process defined in the company.
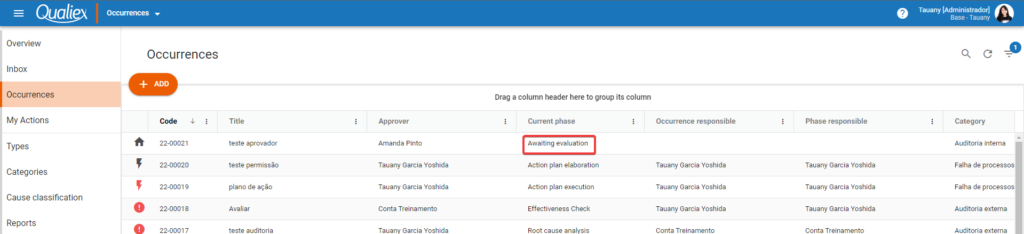
The list of occurrences to be evaluated will be displayed in both tabs.
Click on the issue that will be approved.
In the screen with the information of the occurrence, fill in the fields.
General tab
Emission data
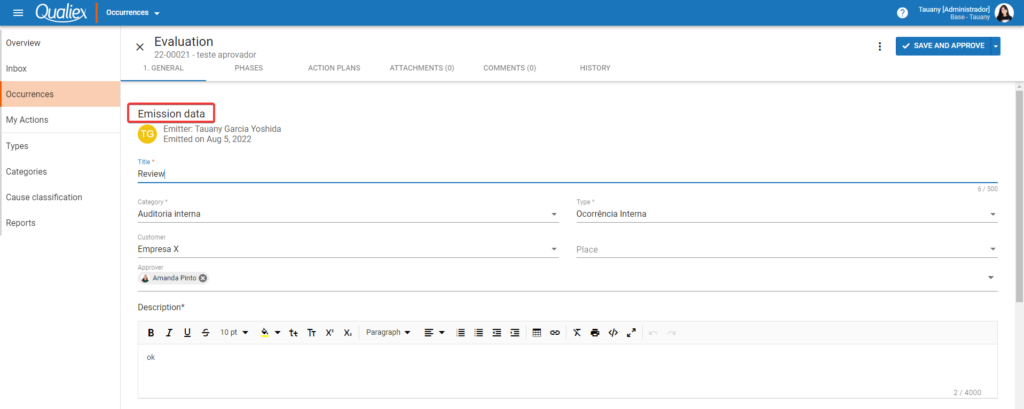
Fields with * are mandatory.
- Issuer: Identifies the user who registered the occurrence, when it is an anonymous user, displays as Issuer: Anonymous.
- Issued on: Shows the date on which the occurrence was registered.
- Title: Displays the title that was inserted in the registration of the occurrence, it is possible to edit in the approval.
- Category: If they are blank it means that the category was not identified at the time of registration it is necessary to define it in the approval.
- Type: If the type was not defined when it was registered, it is necessary to select it when approving.
For users who have permission to manage types, categories, and cause classifications, it is possible to register a new category and a new type using ![]() the first option in the list.
the first option in the list.
- Customer: Select the customer related to the recorded occurrence.
- Location: Inform the place where the occurrence that will be registered occurred.
For users who have the Manage> Customers permission in the Qualiex settings, it is possible to register a new customer and a new location using ![]() the first option in the list.
the first option in the list.
- Description: Following is the description of what happened by the user who registered the occurrence, it can be complemented in the approval.
- Use the bar to format the text.

After entering the occurrence identification information, we can proceed to the treatment data.
Dealing data
Enter the data corresponding to the handling of the occurrence.
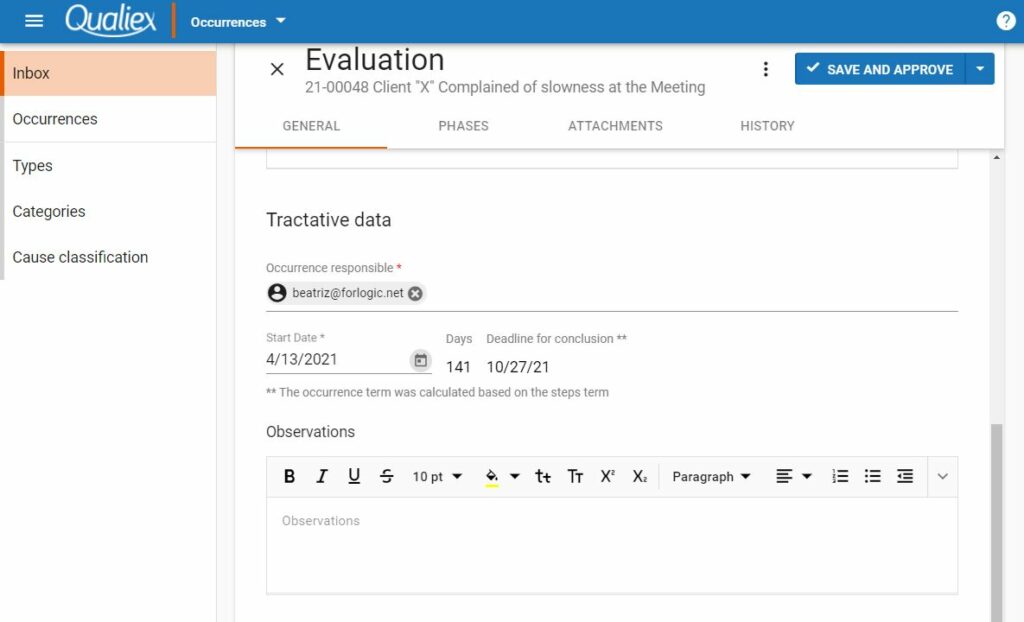
Fields with * are mandatory.
- Responsible for the occurrence: Select the user who will have full autonomy in the steps of Cause analysis, Elaboration of the action plan and execution of the plan.
- Start date: Select the start date for dealing with the occurrence.
- Days: Recorded considering the deadlines defined in the category for the stage of analysis of the cause , elaboration and execution of the action plan. The deadline for the effectiveness verification and standardization / disclosure steps are defined in the module settings .
- Completion deadline: Considering the days of the defined steps, the completion date is displayed, which considers the working days defined in the module settings.
- Observations: If any observation is necessary about this occurrence, insert it in this field.
- Use the bar to format the text.

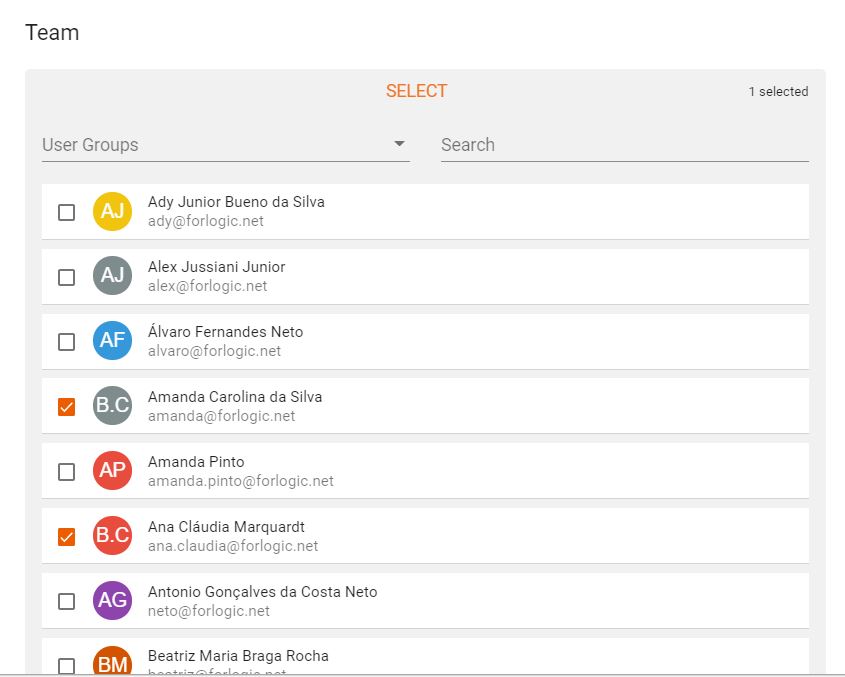
With the treatment data filled in, we can define the people who will contribute to the investigation of the root cause.
Team
Select the users who can assist in discussions and analysis to understand and investigate the root cause of the occurrence.

To access the list, click on Select.
- User group: If your unit has a group of registered users, select the group to display the linked users.
- Search: Use to find a collaborator.
After selecting the collaborators who will be part of the negotiation team, click Finish.
After filling in the data you can already approve the occurrence by clicking on  or just save to continue filling in another time, but if you need to define a person responsible for each stage of the deal and insert attachments, we have a few more steps until you have everything ready for approval.
Steps tab
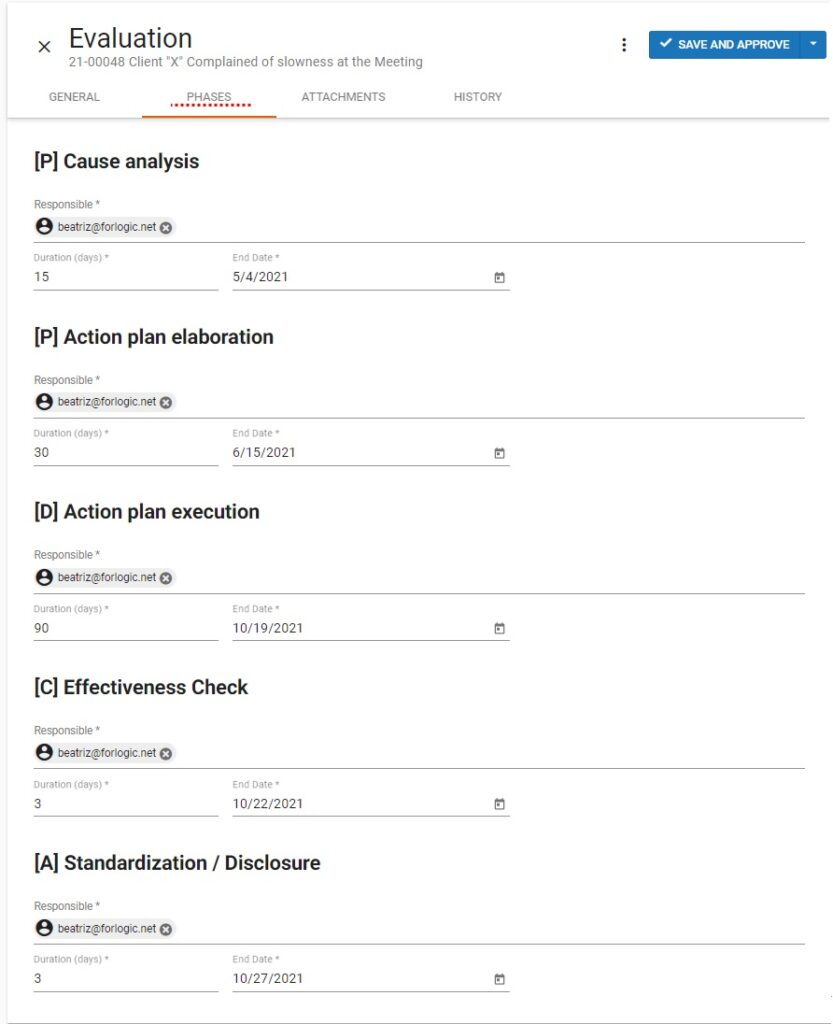
To define a person responsible for each stage of the negotiation or to change the deadlines, access the Steps tab.
Remembering that when editing the dates of the stages the Completion Deadline is adjusted.
If you need to view or add any attachments to the issue, click the Attachments tab.
Attachments Tab
Insert or view the attachment that was added to the occurrence record.
Drag the file from your computer or click  to choose the file, it can send several files at once.
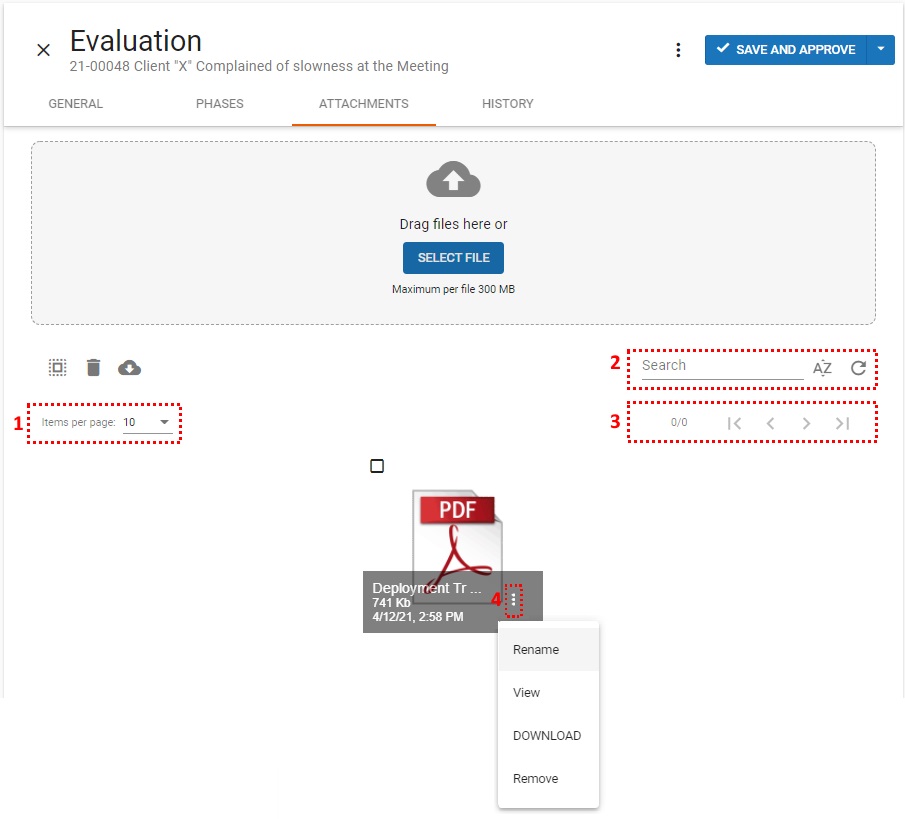
We have some features for managing attachments.
- Appendix Functions: Click
 to select all files. Select the file and click
  to remove. To download the selected files, click
  .
. - Search: Locate a file by name by clicking
 sort from A to Z or by the files with the oldest upload. To update the listing, click
  .
. - Pagination: Select how many items to display on the page and browse using the options
 .
. - Attachment options: By clicking on the context menu in
 the attachment, we can rename the file, view, download or remove it.
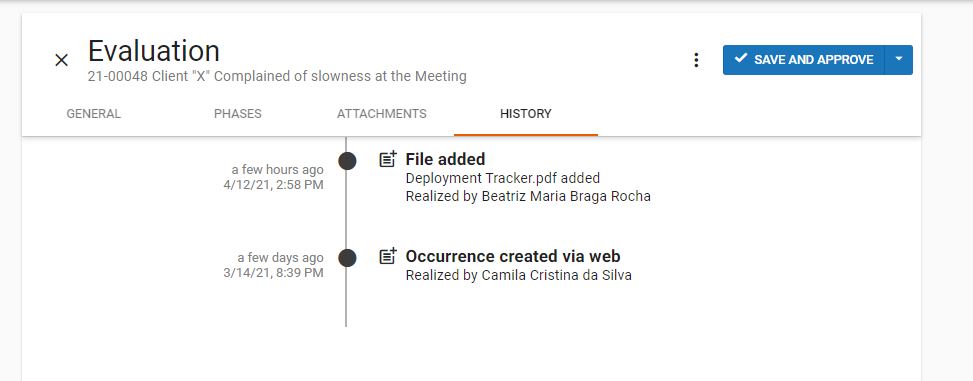
History tab
In the History tab we have the registered changes.
Approve the occurrence
To approve the occurrence, click on Save and approve and we have two options:
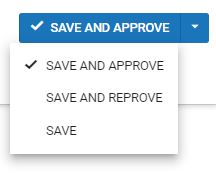
- Save and approve: After approving the occurrence, it is forwarded to the cause analysis stage.
- Save and fail: Save the data and fail the occurrence.
- Save: Stores the event and can be edited until it is ready to be forwarded to the cause analysis step.
![]()
